In this tutorial, we will describe how to import variants.
Each product variant consists of one or more options:
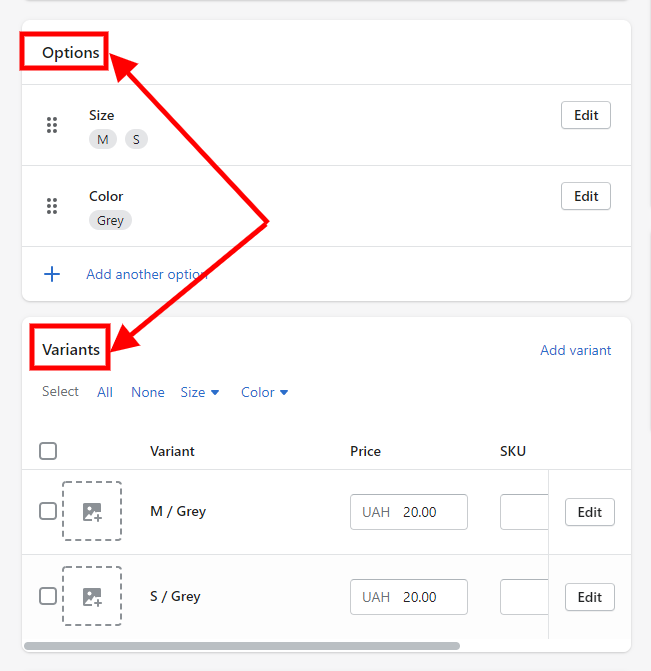
The option name is the variant title, such as «Size» or «Color». The option value is the variant value, for example: «M», «S» or «Grey».
Example: if you want to import a product with 8 variants:
- Black – M, L
- Green – M, L
- Red – M, L
- Blue – M, L
You can use a file in the following format:
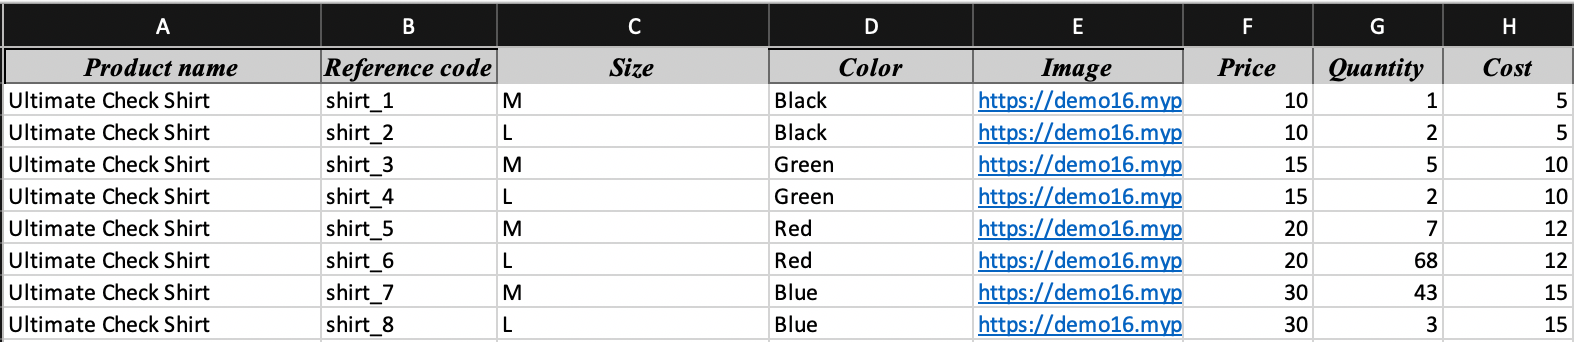
👉 Each product variant must be listed on a new line. Each line should contain the product identification key (in this example: product name) plus other information you want to import: SKU, price, vendor, collections, quantity, etc.
How to Import Variants
In this example, we use a file exported from a PrestaShop store. The process is similar for files from other stores or suppliers.
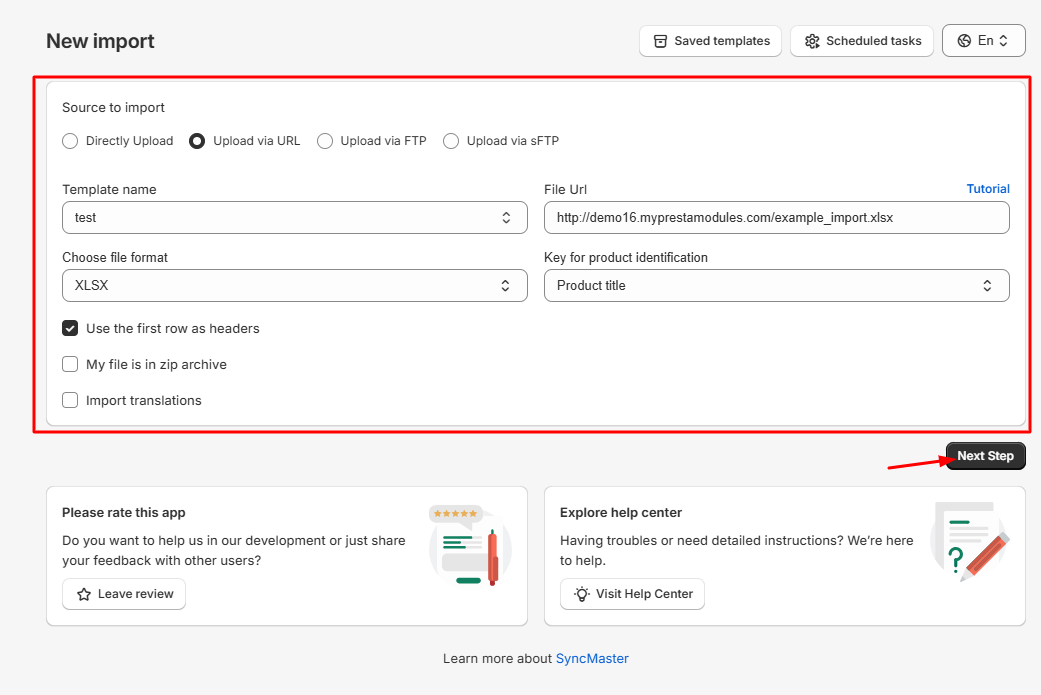
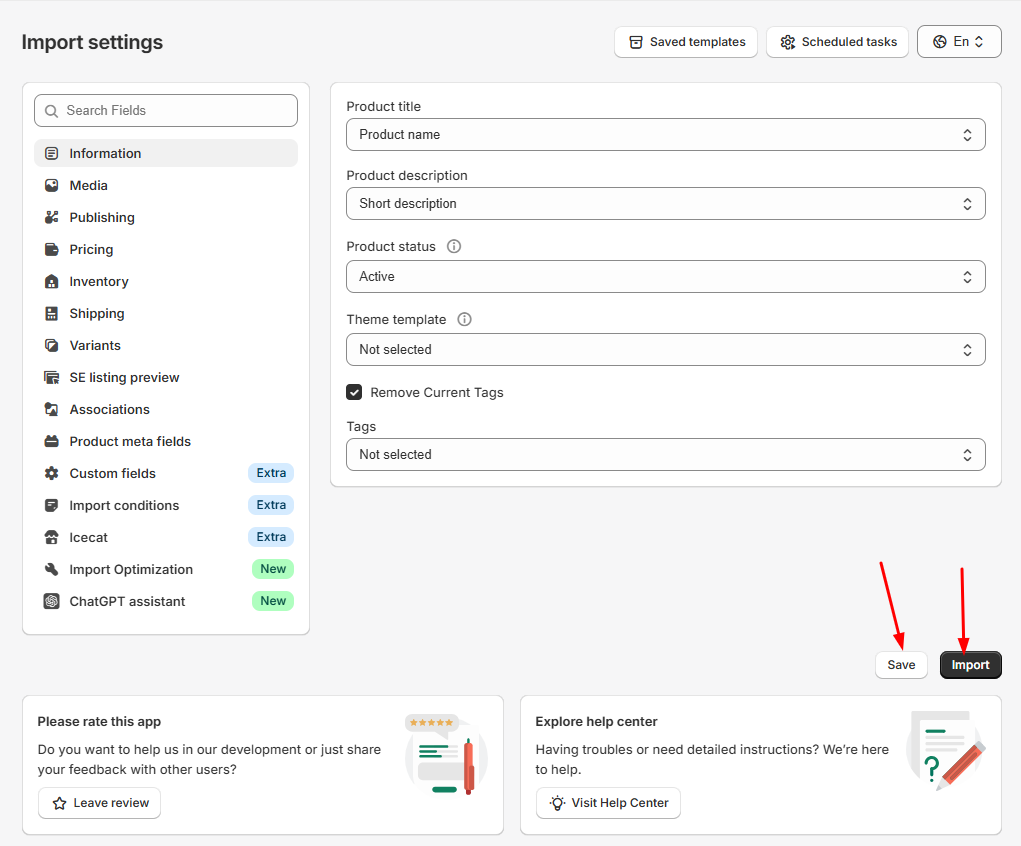
Step 1: Open the General Settings tab in the Products Sync Master app and upload your file.
Step 2: Adjust the field mapping between your file and the import data.
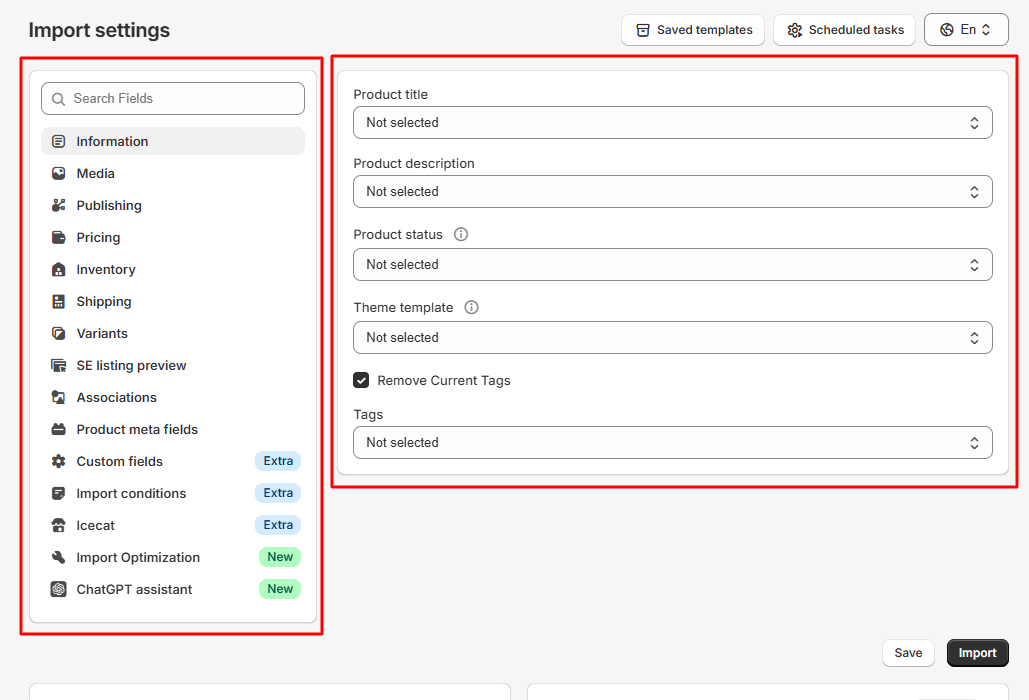
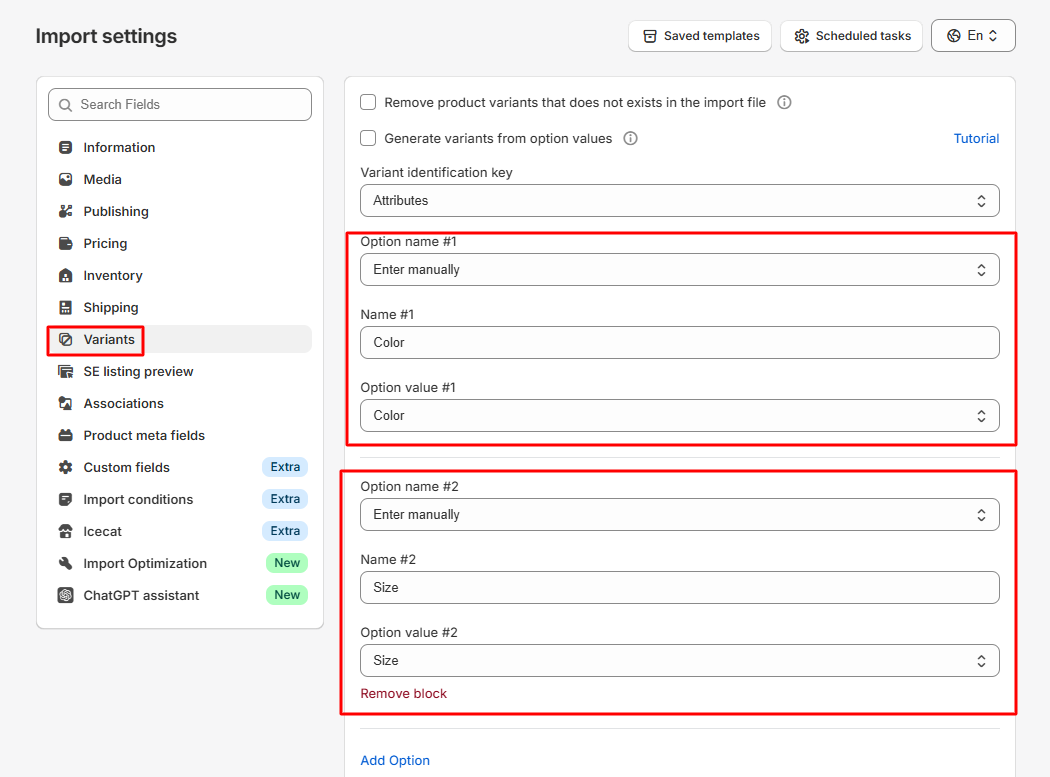
Step 3: Configure variants:
- In the Options group, select Enter manually.
- Enter a name for the option (e.g., «Size»).
- Select the corresponding Option value field from your file (e.g., «Size» column).
- Click Add option to add another (e.g., «Color» with values from the «Color» column).
- Select other variant data to import (SKU, price, etc.).
Step 4: Save the import settings and click Import Now.
Step 5: Wait until the import is finished. ⚠️ Import duration depends on the number of products — it can take seconds or hours. You can close the window and review progress on the Latest Jobs page. After completion, you’ll see a confirmation message:
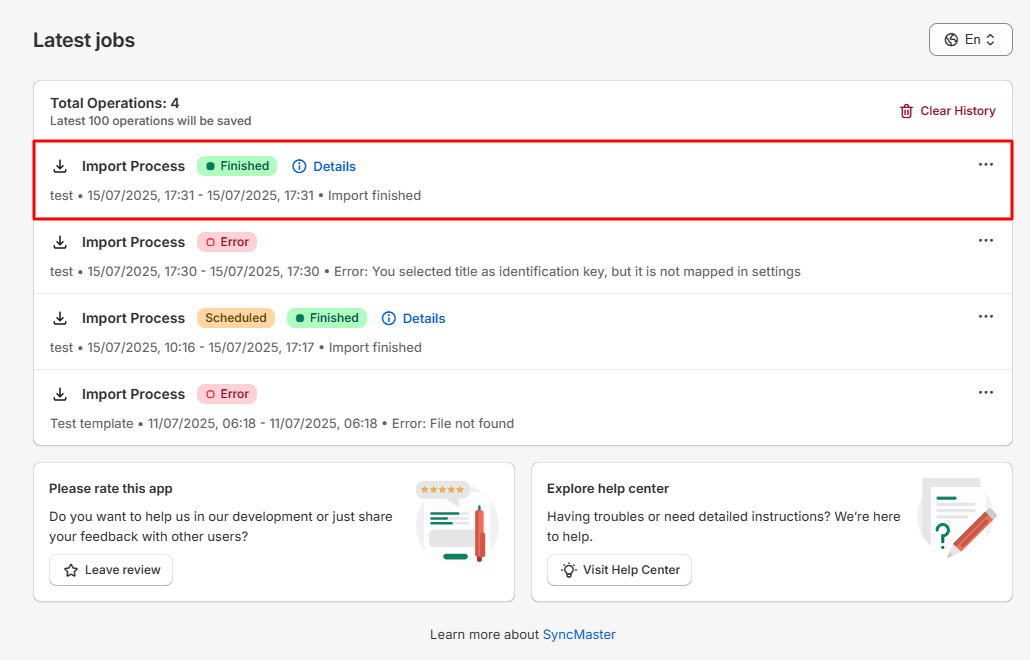
Step 6: Verify imported products in your store.

That’s it! You’ve successfully imported products with multiple variants and options.
- How to Import Product Variants
- How to Map Collections During Import
- Import Files by Dynamic URL Pattern
- Import Files from FTP with Dynamic File Names
- How to Import Product Translations
- Import Products from Google Sheets
- Error during sync locations - need to update access scopes
- Import Optimization – Control New & Existing Product Updates
- Generate Variants from Option Values
- Import Products from Icecat Catalog
- Import Conditions – Control How Products Are Imported
- Import Product and Variant Metafields
- How to Import Collections
- How to Import Product Categories (Shopify Standard Taxonomy)
