In this tutorial, we will find out how to generate & import product tags using ChatGPT Assistant.
This can be useful, for example, when you have a fairly large number of products without tags or need to add more tags automatically.
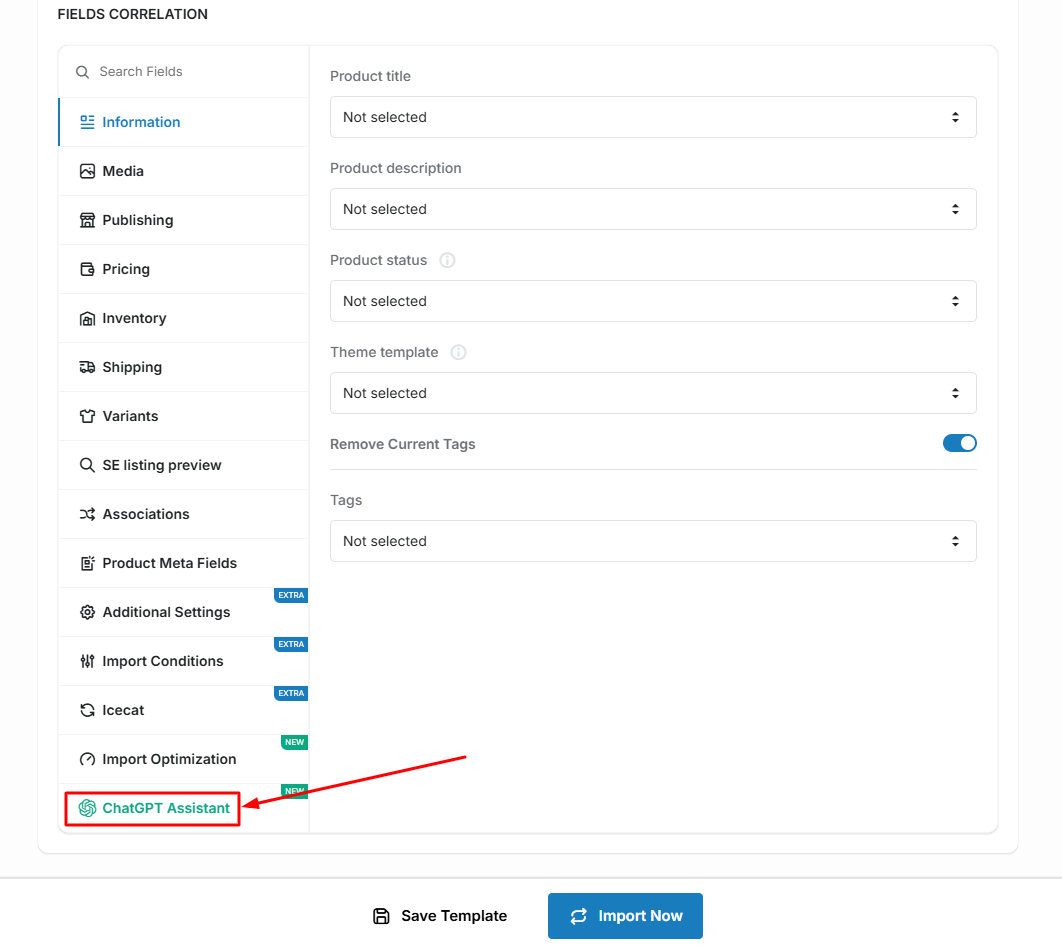
Complete the first import step, upload your file, and select a Key for product identification.
In the second step of the import, go to the «ChatGPT Assistance» tab:
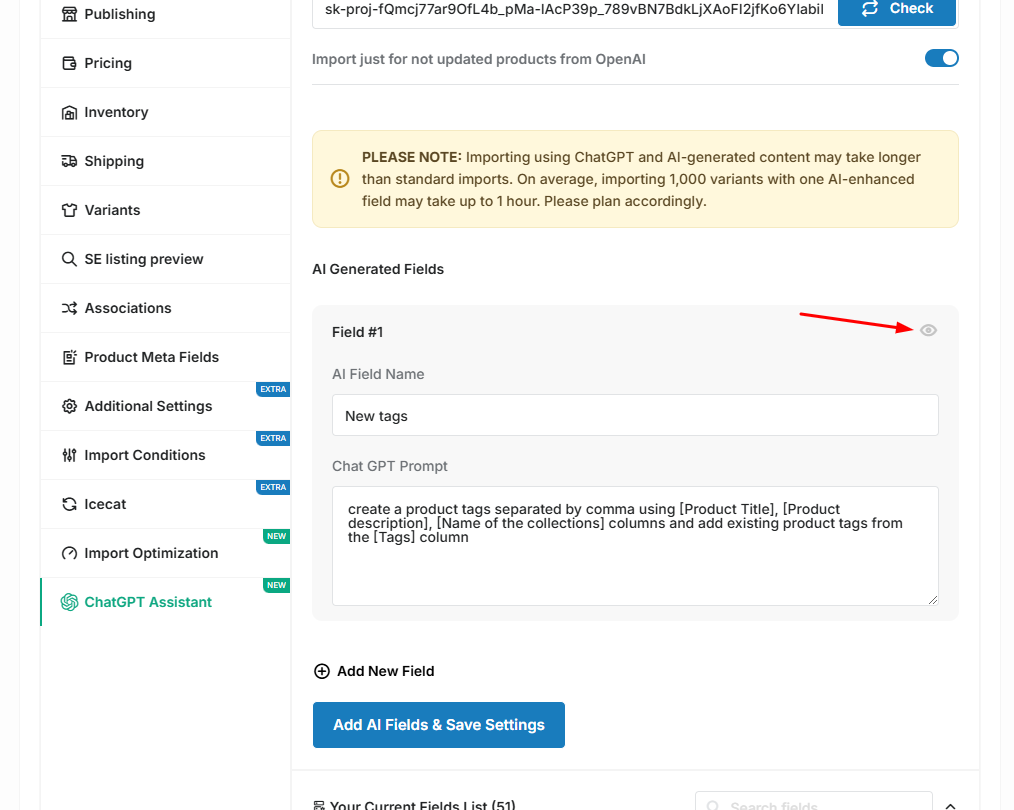
Insert your «OpenAI API Key» into the «OpenAI Config» section:
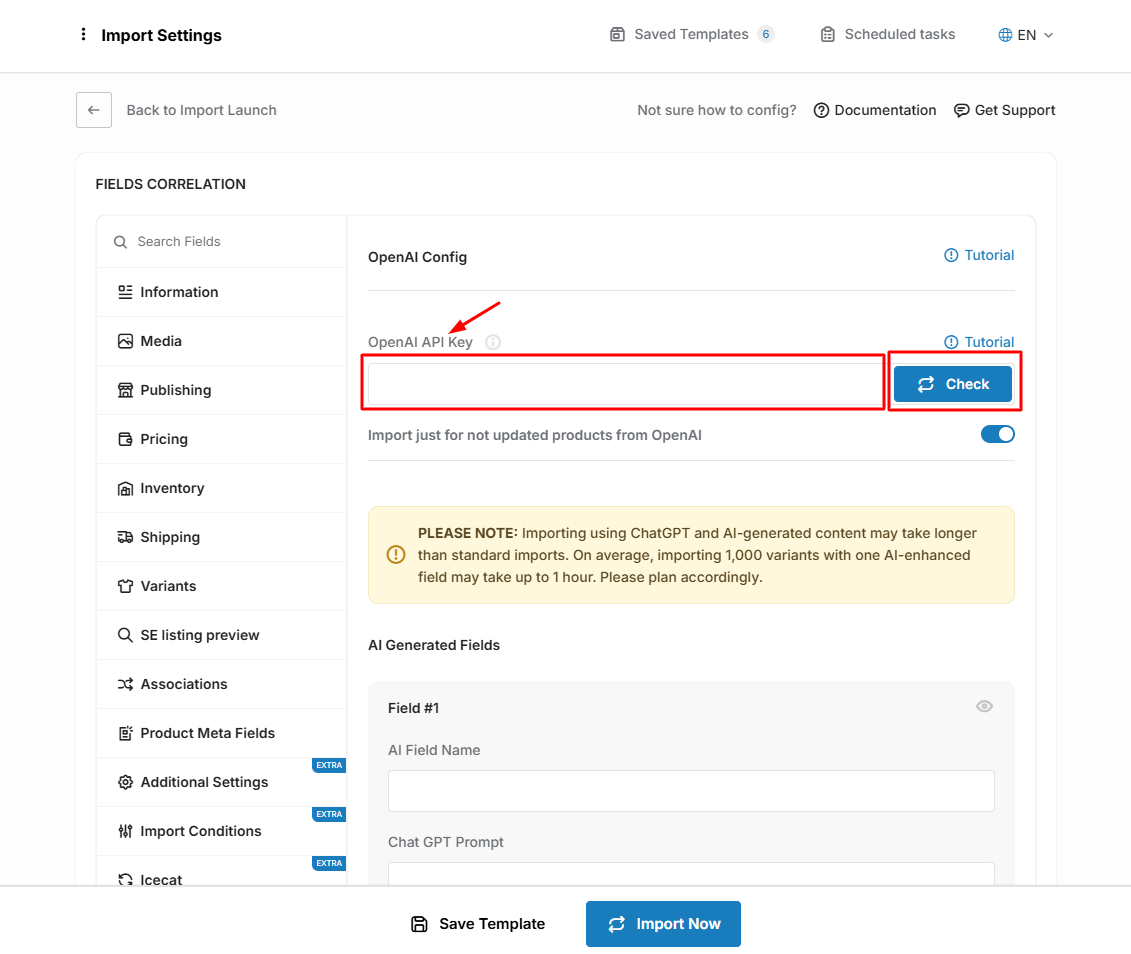
Where to get the API Key? Read this tutorial.
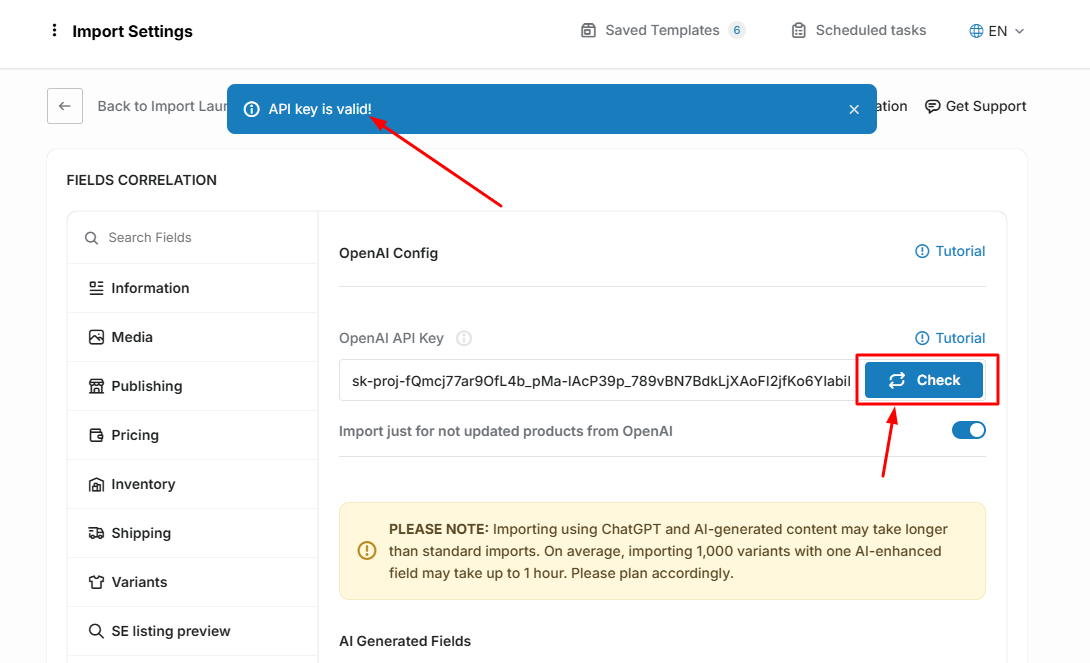
Click on the «Check» button to validate the API Key:
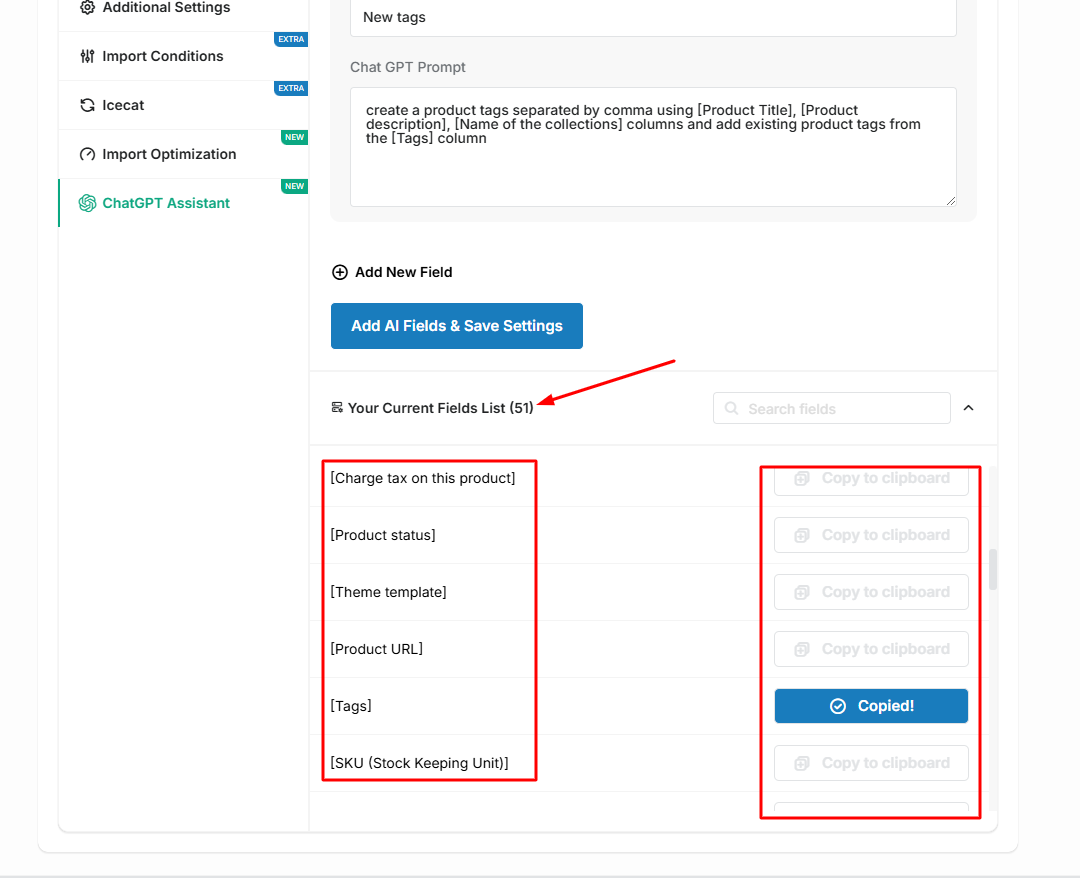
Create a new field, for example, «New tags», and write a prompt for ChatGPT, according to which you can generate new tags:
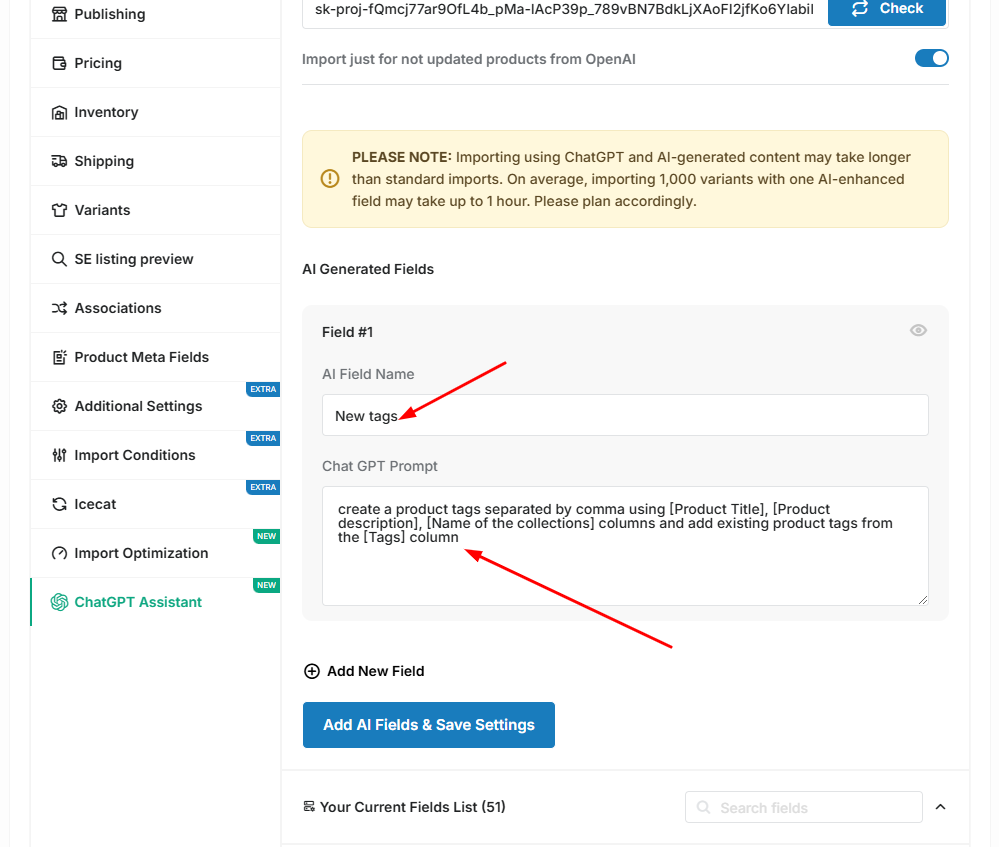
As you can see, we use shortcodes with field names in our file, which makes things much easier:
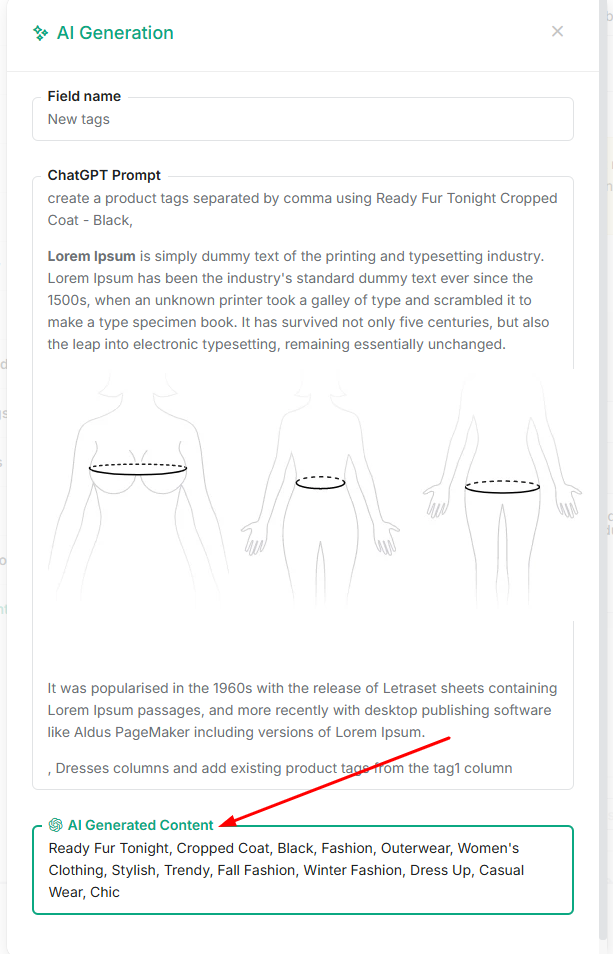
You can use the query preview to see how it works. Click on the corresponding icon next to each created field:
ChatGPT will generate a new field according to our prompt:
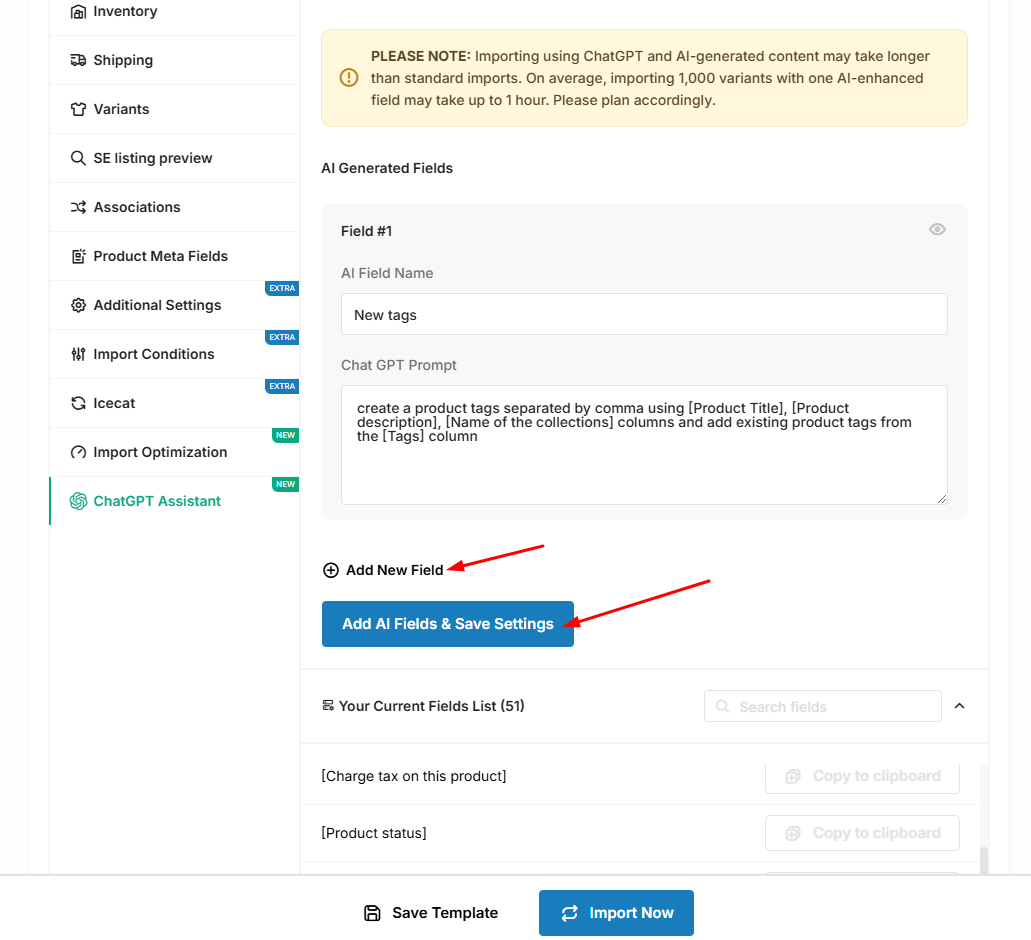
NOTE: Don't forget to save AI Fields or add one more field by clicking the corresponding buttons:
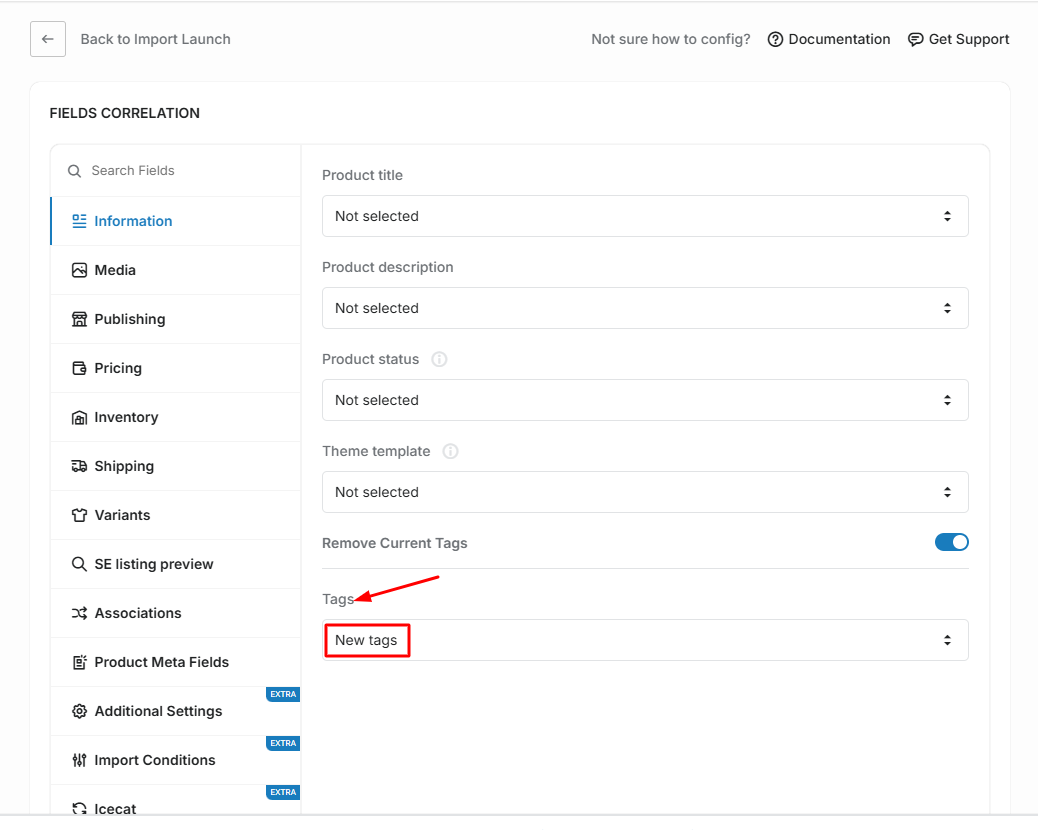
If everything is good, navigate to the «Information» tab and choose the «Tags» field we created earlier:
Now you can save a template for future use, or click on the «Import Now» button to start the import translations process.